
 English
 русский
 中文简体
 Español
 Deutsch
 عربى


How to Read a Boob Tape Map for Different Outfits
Content
- 1 What Is a Boob Tape Map, and What Does It Show?
- 2 How Can You Match a Boob Tape Map to Your Outfit?
- 3 How Do You Read Tape Direction and Placement?
- 4 Which Boob Tape Map Works for Different Necklines?
- 5 How Should You Adjust a Boob Tape Map for Different Body Shapes?
- 6 What Should You Check Before Applying Boob Tape?
- 7 Why Can a Boob Tape Map Look Different Under the Finished Outfit?
Choosing an outfit often involves more than finding the right size or color. Backless dresses, strapless tops, deep necklines, and open-sided designs can make traditional bras difficult to wear. Boob tape offers another way to support the bust while keeping straps and bands out of sight. However, applying it can feel confusing, especially when the garment has an unusual shape.
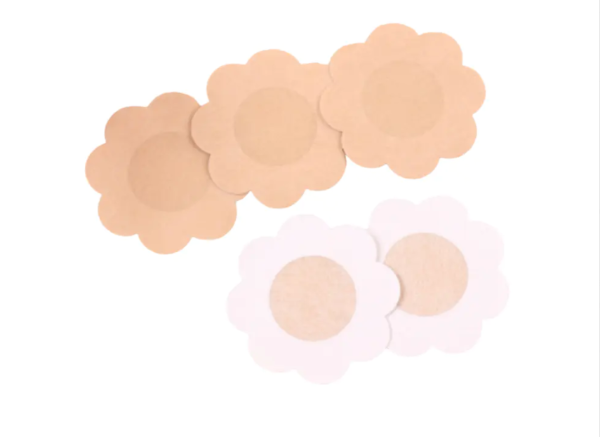
A boob tape map helps make the process easier to understand. It is a visual guide that shows possible tape placement, strip direction, and coverage for different clothing styles. Rather than treating every outfit the same way, the map helps users understand how the placement of each strip relates to the neckline and the support they want.
Reading a map is not simply a matter of copying a picture. Body shape, skin sensitivity, fabric, and the design of the garment all affect how the tape should be applied. Learning to interpret these details can help users plan their outfit with greater confidence and avoid common application mistakes.
What Is a Boob Tape Map, and What Does It Show?
A map is a visual reference for applying adhesive body tape to the bust. It usually presents the body from the front, side, or a slightly angled view. Some guides include several diagrams to show how the placement changes with different necklines and clothing designs.
The main purpose is to explain where the tape may begin, which direction it follows, and how separate strips work together. A diagram might show strips extending upward from the lower bust, running toward the shoulder, or crossing the chest to create a particular shape.
Each arrangement serves a different styling purpose. Some placements focus on lifting the bust. Others help bring the bust inward, create a rounded appearance, or keep tape hidden beneath a specific neckline.
A map may use lines, arrows, shaded areas, or numbered strips to explain the application. These visual details should be read as instructions rather than decoration.
| Map element | What it usually means | What to check |
|---|---|---|
| Lines or colored strips | Suggested tape placement | Whether the strips follow the intended body area |
| Arrows | Direction of application or intended lift | Whether the direction suits the garment and individual needs |
| Numbered sections | Suggested order of applying strips | Whether the guide explains where each strip begins and ends |
| Front-view diagram | Placement across the chest | Whether the tape remains hidden beneath the neckline |
| Side-view diagram | Placement around the outer bust | Whether the arrangement suits the garment's side coverage |
| Shaded areas | Possible tape coverage or restricted zones | Whether sensitive skin areas are protected |
Not every map uses the same symbols. Some are detailed tutorials, while others show only a finished arrangement. If the diagram does not explain its markings, look for accompanying instructions before applying the tape.
It is also important to remember that a map is a reference, not a universal template. A placement that works with one person's proportions may need adjustment for another. The goal is to understand the logic of the arrangement rather than reproduce every line exactly.
How Can You Match a Boob Tape Map to Your Outfit?
The neckline and back design of an outfit are useful starting points. They determine which areas need to remain uncovered and where tape can be placed without becoming visible.
A strapless dress, for example, may allow tape to extend toward the upper chest, while a deep V-neck top leaves less room near the center. A backless garment may require a placement that avoids the back entirely.
Before selecting a map, examine the garment from the front, sides, and back. Identify the areas where fabric covers the body and the areas that remain exposed. This simple check can help narrow down the suitable placement options.
Different clothing styles often call for different approaches.
| Outfit style | What to look for in the map | Main styling consideration |
|---|---|---|
| Strapless dress | A placement that supports the bust without relying on shoulder straps | Keeping the upper edge of the tape below the neckline |
| Deep V-neck top | Strips arranged to avoid the center of the neckline | Preventing tape from showing when the wearer moves |
| Backless dress | A front-focused arrangement with limited or no back coverage | Maintaining support while keeping the back exposed |
| One-shoulder top | An arrangement adapted to the covered and uncovered shoulders | Avoiding visible tape along the open side |
| Open-sided dress | Placement that stays within the front coverage of the garment | Checking visibility around the outer bust |
| Square-neck top | A relatively balanced placement that follows the straight neckline | Avoiding tape that extends above the fabric edge |
The table provides general guidance, not fixed rules. A particular garment may have a lining, structured cups, or built-in support that changes how much tape is needed.
The material also matters. Stretchy fabric may move differently from a structured woven dress. Thin or closely fitted clothing can reveal the outline of tape, even when the adhesive itself is hidden. Trying the planned arrangement under the actual outfit can reveal these issues before the garment is worn for an event.
How Do You Read Tape Direction and Placement?
Tape direction is one of the most important details in a boob tape map. The direction of a strip influences where the skin is pulled and how the bust is supported. A strip placed vertically may serve a different purpose from one placed diagonally or horizontally.
Many maps use arrows to indicate the intended direction of the strip. Read these arrows together with the starting and ending points. The same direction may not suit every body shape, and pulling the tape more firmly does not automatically create better support.
Common placement patterns include the following.
Vertical placement
A vertical strip may run from below the bust toward the upper chest. This arrangement is often used when the goal is to provide upward support while keeping the tape away from the center of the neckline.
When reading a diagram, check where the strip is intended to stop. If it extends too high, it may become visible above the garment. If it starts too close to sensitive skin folds, it may cause discomfort.
Diagonal placement
Diagonal strips may extend from the outer or lower bust toward an upper point on the chest. Depending on the arrangement, they can help shape the bust while leaving part of the neckline uncovered.
The angle matters because it determines how the tape follows the body. A steep diagonal may be suitable for one garment, while a different angle may be needed for a wider neckline.
Horizontal placement
Horizontal strips follow a more side-to-side direction. Some maps use this arrangement to support or stabilize the bust across a particular area.
Horizontal placement may be less suitable when the garment has a very low neckline or exposes the sides of the chest. The diagram should be checked against the garment before use.
Crossed or layered placement
Some maps show several strips that overlap or follow different directions. These patterns may be designed to distribute support across more than one area.
The order of application matters when the guide specifies it. Overlapping strips should not create uncomfortable pressure or excessive tension. More tape is not necessarily needed just because a diagram contains several layers.
When reading any placement pattern, look at the overall shape formed by the strips. This helps explain how each strip relates to the others and why the map differs from a simpler arrangement.
Which Boob Tape Map Works for Different Necklines?
Necklines create different limits on tape placement. A suitable map should account for these limits while considering the support the wearer wants.
For a deep V-neck, the central chest area is highly visible. The map should show how to position tape away from the neckline edges. If the strips extend too far inward or upward, they may appear when the wearer bends or moves.
For a strapless outfit, the main challenge is supporting the bust without allowing tape to show above the fabric. The map may use an arrangement that extends upward from beneath the bust. The actual placement depends on the dress's cut, the wearer's proportions, and any built-in structure.
Backless designs create a different problem. A map that relies on tape extending across the back may not work with a garment that leaves that area exposed. A front-focused arrangement may be more suitable, but it still needs to provide comfortable support without reaching the visible edges of the dress.
One-shoulder garments require attention to the difference between the covered and uncovered sides. A symmetrical diagram may not suit an asymmetrical neckline. The tape placement may need to follow the garment's shape instead of using identical strips on both sides.
Square necklines have relatively straight edges. The main concern is keeping the tape within the covered area while avoiding visible lines near the corners of the neckline.
When comparing maps, ask three questions:
- Does the placement stay hidden under the garment's neckline?
- Does it provide the type of support the wearer wants?
- Can the tape be applied and removed without excessive pulling or discomfort?
These questions help narrow the choices without assuming that one diagram suits every outfit.
How Should You Adjust a Boob Tape Map for Different Body Shapes?
A map often presents a simplified body shape. Real bodies vary in bust size, spacing, fullness, skin texture, and the position of the bust on the chest. These differences affect how the tape lies against the skin.
A person with a wider bust may need a placement that follows a broader area. Someone with closer-set breasts may find that a diagram designed for wider spacing places the strips incorrectly. Differences in fullness can also affect where the tape needs to sit to create the intended shape.
The important point is to use the map as a guide to placement and direction rather than as a precise measurement.
Pay attention to the following factors:
- Bust shape: The placement should follow the natural contours of the body rather than force the bust into an uncomfortable position.
- Skin condition: Irritated, damaged, or sensitive skin may not tolerate adhesive tape well.
- Desired support: A subtle shaping effect may require a different arrangement from a more noticeable lift.
- Garment coverage: The tape must remain within the areas concealed by the clothing.
- Comfort during movement: The arrangement should remain comfortable when standing, sitting, and moving naturally.
It is not necessary to create identical placement on both sides if the body or garment is asymmetrical. The aim is to achieve a suitable result while keeping both sides comfortable.
Avoid pulling the skin aggressively to match a diagram. Excessive tension can increase discomfort and may contribute to skin irritation or injury during removal. If the tape feels painful, causes numbness, or restricts normal movement, remove it carefully rather than trying to maintain the intended shape.
What Should You Check Before Applying Boob Tape?
Understanding the map is only part of the process. Preparing the skin and checking the tape can help reduce avoidable problems.
Start by reading the instructions supplied with the tape. Adhesive products differ in their materials, intended uses, and removal recommendations. A map created for one product may not be suitable for another.
Skin preparation should be gentle. The application area should be clean and dry, without oils or lotions that may interfere with adhesion. Avoid applying tape to broken, inflamed, sunburned, or otherwise irritated skin.
A small skin test, following the product's instructions, can help identify a possible reaction before a larger area is covered. However, a small test cannot guarantee that irritation will not develop during extended wear.
The nipple and other sensitive areas should be protected from direct adhesive contact. Some users place a suitable protective covering over the nipple before applying the surrounding tape. The covering should be compatible with the product and should not create uncomfortable pressure.
Before following the map, check that you have enough tape to complete the intended arrangement without stretching each strip to its limit. Cut the strips in advance if the product instructions allow it. This can make placement easier and reduce the need to handle the adhesive repeatedly.
A few additional precautions are worth keeping in mind:
- Follow the product's guidance on application, wear time, and removal.
- Avoid stretching the tape excessively or pulling the skin into an uncomfortable position.
- Keep adhesive away from sensitive areas that should not be directly covered.
- Do not apply tape over irritated skin or use it when a previous reaction suggests that the adhesive is unsuitable.
- Stop using the tape if burning, itching, pain, swelling, or other signs of irritation develop.
Boob tape is intended for external use. It should not be treated as a medical support device unless the product is specifically designed and labeled for that purpose.
Why Can a Boob Tape Map Look Different Under the Finished Outfit?
A map may appear clear when viewed on its own, yet the finished outfit can reveal unexpected details. Tape may show near the neckline, the edges may create visible lines, or the placement may shift when the wearer moves.
These problems often result from differences between the diagram and the actual garment. A map may show an idealized neckline, while the real outfit has a lower cut, thinner fabric, or a more open side. The garment may also move when the wearer sits, raises their arms, or turns.
Fabric texture influences visibility. Smooth, thin materials can reveal the outline of tape, while heavier or lined garments may conceal it more easily. Stretch fabric can also move against the skin, changing where the edges of the tape appear.
A practical way to check the result is to try the planned arrangement with the intended outfit before the occasion. Look at the front, sides, and back in a mirror. Move naturally and check whether the tape remains concealed.
If the tape is visible, reconsider the relationship between the map and the garment. The solution may involve choosing a different placement pattern rather than adding more strips. Additional layers can create bulk and make the edges more noticeable.
It is also useful to distinguish between a styling issue and a comfort issue. A small visible edge may indicate that the placement does not match the garment, while pulling, pinching, or persistent discomfort may indicate that the tape is under too much tension or is unsuitable for the wearer.
A boob tape map is most useful when it helps connect the design of the outfit with the placement of the tape. Understanding the symbols, direction, and coverage shown in the diagram makes it easier to compare options and identify a method that suits the garment. The actual application should still be guided by the product instructions, individual body shape, skin comfort, and the way the outfit fits during movement.
Keep In Touch

No.455 New Town Development Road,Longgang City, Wenzhou City

 +86-0577-83728222
 +86-0577-837282222

Copyright © Wenzhou Anqi Medical Supplies Co., Ltd. All Rights Reserved.
Approval No: Zhejiang Wenzhou Food and Drug Administration Machinery Production Filing No. 20200025
The information provided on this website is intended for use only in countries and jurisdictions outside of the People's Republic of China.
